Notes on the Pi Book Pro laptop shell
The Pi Book Pro is a DisplayLink USB 3.0 1080p monitor, keyboard, and trackpad in a laptop shell for the Raspberry Pi 3 and 4.
It was originally the Sentio Superbook, an Android phone laptop shell, except Sentio went out of business. The Pi Book Pro is the leftover stock.
These notes are based on testing the Pi Book Pro with an early model 4GB Raspberry Pi 4B and a late model 8GB.
- Stock firmware cabling, power
- v0.7.0.3+ firmware cabling, power
- Display, overscan, bezel
- Trackpad
- Charging LEDs, battery
- Firmware update
- Firmware downgrade
- Raspberry Pi 4 USB 3 v. USB 2 performance
- Switching to HDMI, multiple displays
- Raspberry Pi Zero
- Other open questions
Installing on Pi 3B/4, Raspberry Pi OS August 2020, DisplayLink 5.3.1Raspberry Pi OS updates after December 14, 2020- Installing on Pi 2B/3B/4, Raspberry Pi OS March 4 2021, DisplayLink 5.4
Stock firmware cabling, power
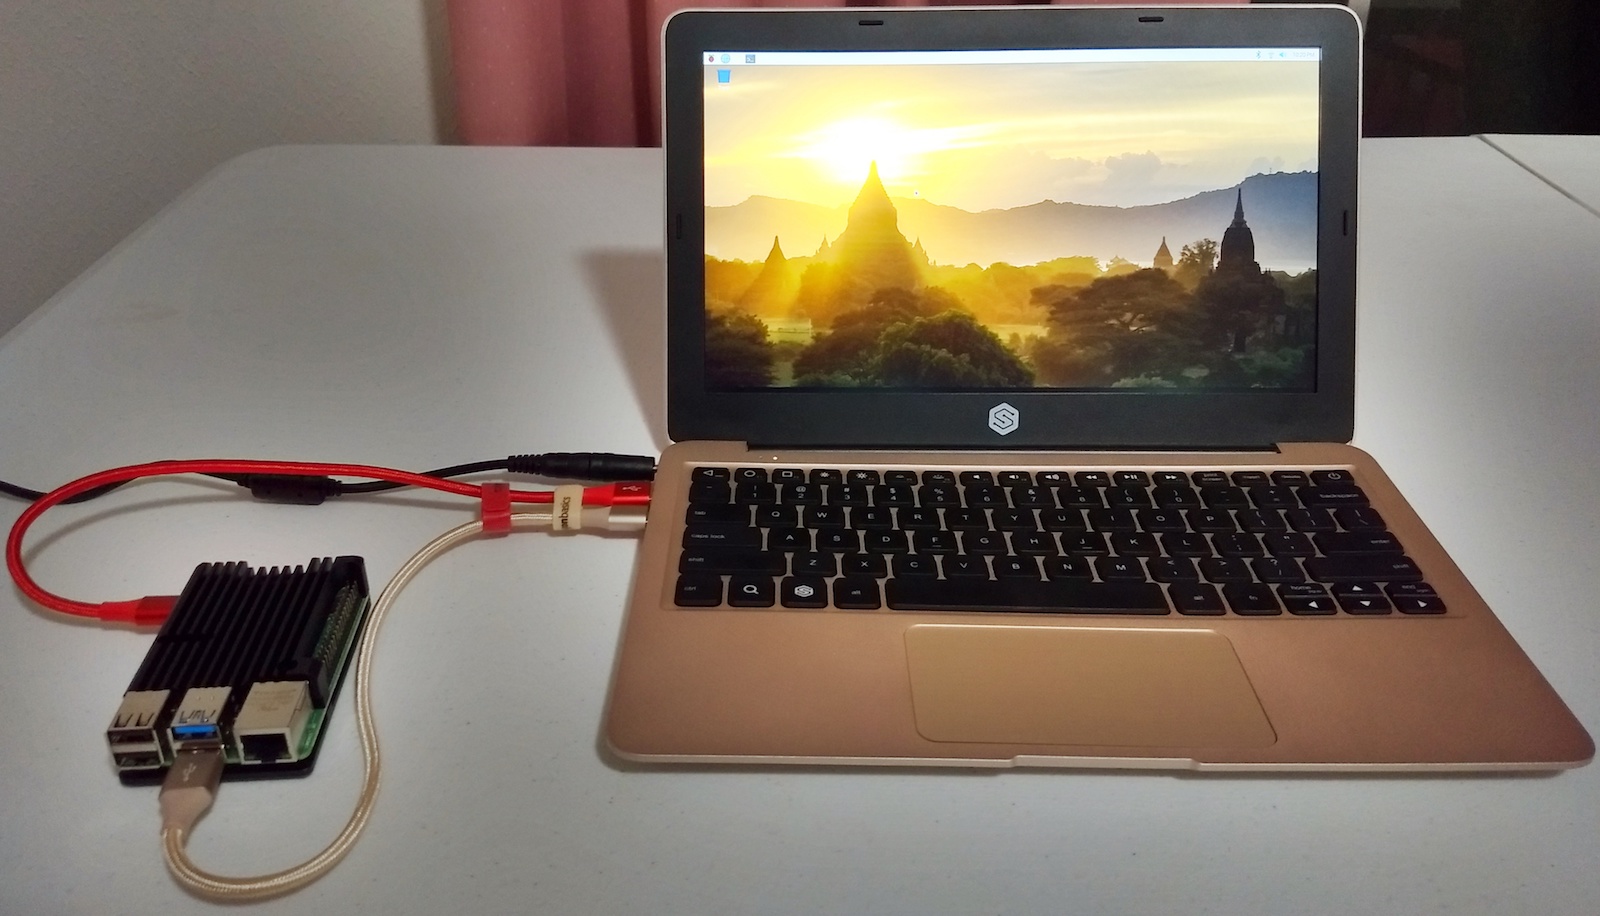
Using the stock firmware only, two short USB-C to USB A 3.0 cables can connect the Pi Book Pro to the Raspberry Pi 4 for both display and power. The USB-A port on the shell seems to provide reliable power to the RPi. A USB 3.0 port on the RPi connects to the USB-C port on the shell to provide display and input.
I don't believe there's any way to safely run the Pi Book Pro using a single USB-C to USB-C cable; the RPi4 doesn't power on when plugged into the shell's USB-C port. Once the Pi is booted, the Pi Book Pro may back-power it through the Pi's USB-A port, but this is not recommended (press Fn-p to disable USB-C power).
Assuming the raspberry-pi-power-supply-check.sh script works on the RPi4 as expected, the Pi Book Pro USB-A port provides stable power, with no reported undervoltaging, when running on both an AC adapter and from battery:
32.0'C 1500 / 1500 MHz 0.8625V -
...
72.0'C 1500 / 1500 MHz 0.8625V -
When running a Pi 4 powered by the Pi Book Pro but using an HDMI display, I have not seen an undervoltage lightning bolt indicator. It's unclear whether one would show up on the Pi Book Pro screen.
At idle, the Pi Book Pro can power the RPi4 for at least six hours:
$ uptime
 21:23:19 up  6:18,  3 users,  load average: 0.00, 0.00, 0.00
The Pi Book Pro AC adapter is 12V 3A, center pin positive, 3.5mm by 1.35mm.
v0.7.0.3+ firmware cabling, power
I don't recommend you dig up old Sentio APKs and try to update the Pi Book Pro firmware. Using the v0.7.0.3 firmware or later, the power coming off the USB-A port cuts out at various points during the boot process, causing the Pi to reset. If you update firmware, you'll need to provide separate power to the Raspberry Pi.
Testing with a late model 8GB Raspberry Pi 4B, it also does not power on when plugged into the shell's USB-C port. There does not appear to be any way to run the Pi Book Pro using a single USB-C to USB-C cable.
Display, overscan, bezel
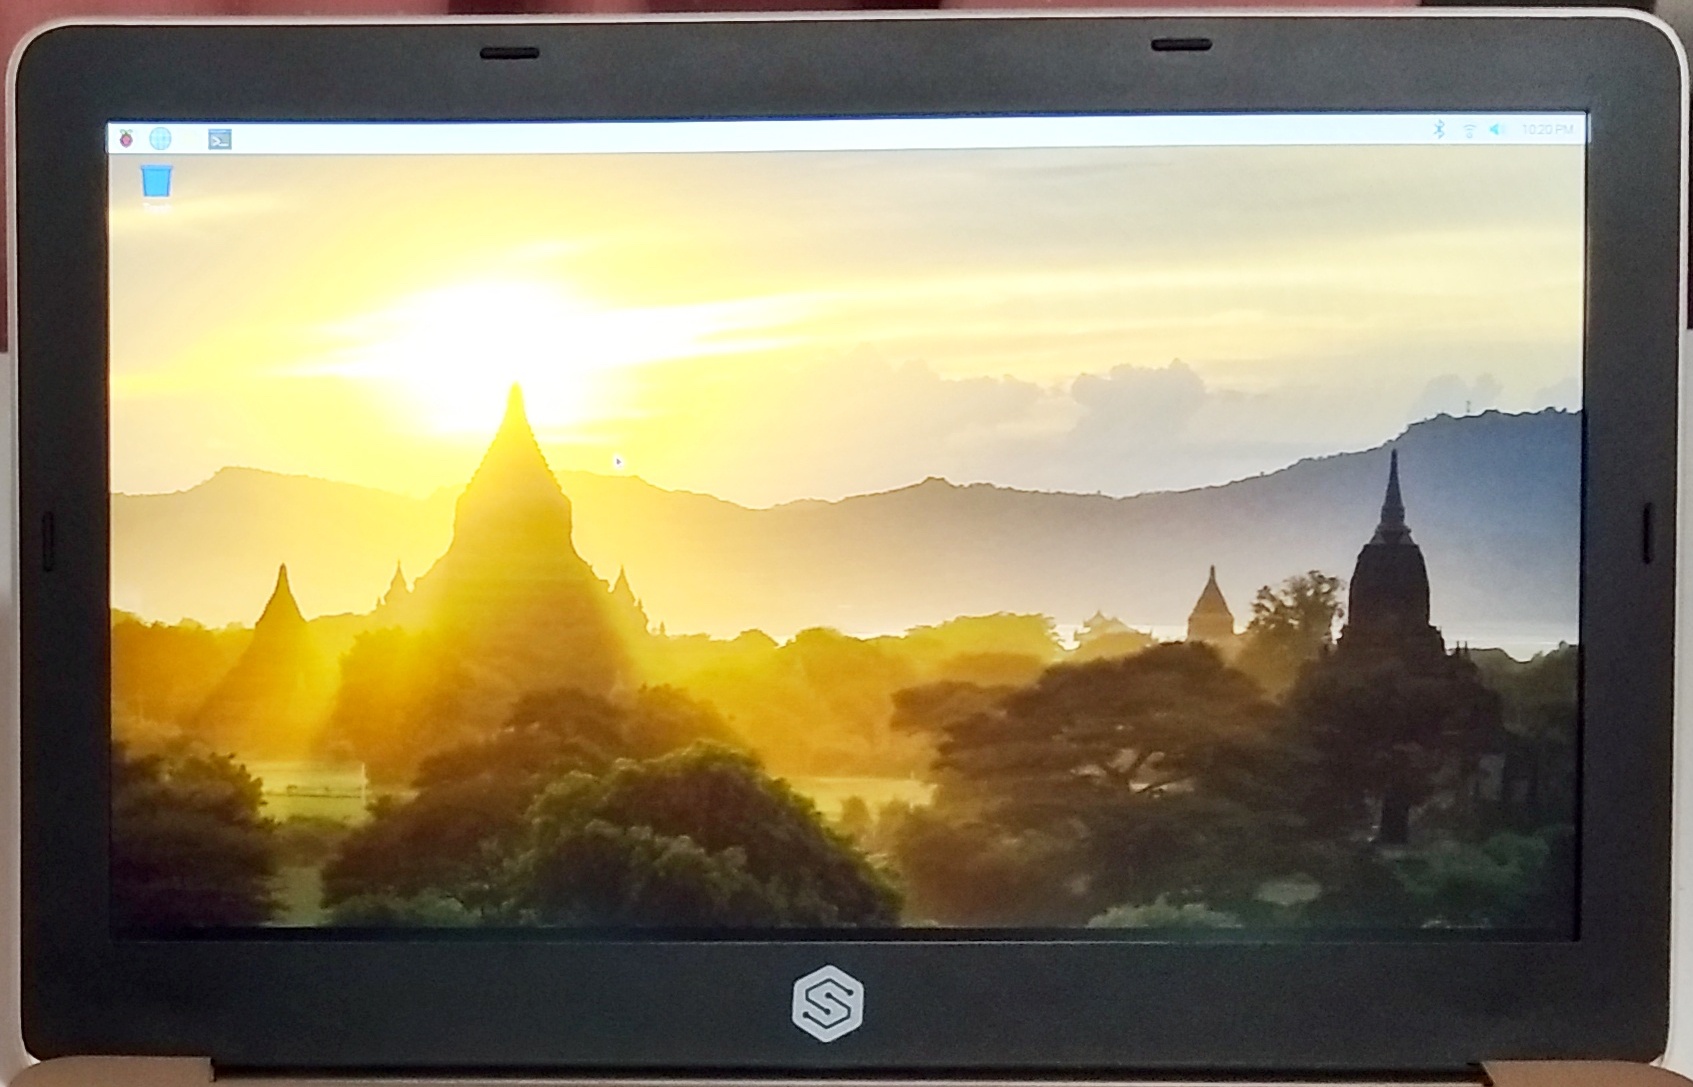
As described in various comments on the Sentio Fandom wiki, while the LCD is 1920x1080, the bezel covers up some pixels all around.
Various Stack Overflow answers suggest applying a transform using xrandr, but this doesn't appear to work, making the display unresponsive when I try it.
This zero-point answer, however, did work for me. Instead of transforming the output, it creates a new display mode, which gets centered within the physical display. Because manufacturing tolerances may mean that some displays may have more or fewer pixels covered, you might still have to follow those steps to get something that maximizes your visible area, but here are a few to get you started.
First, open a Terminal window, and type:
$ sudo nano /usr/share/X11/xorg.conf.d/10-monitor.conf
to create a new 10-monitor.conf file. In it, paste the following:
Section "Monitor"
    Identifier "DVI-I-1"
    # Warning: Aspect Ratio is not CVT standard.
    # 1800x1000 59.91 Hz (CVT) hsync: 62.19 kHz; pclk: 148.75 MHz
    Modeline "1800x1000_60.00"  148.75  1800 1912 2096 2392  1000 1003 1013 1038 -hsync +vsync

    # Warning: Aspect Ratio is not CVT standard.
    # 1904x1048 59.94 Hz (CVT) hsync: 65.15 kHz; pclk: 165.75 MHz
    Modeline "1904x1048_60.00"  165.75  1904 2024 2224 2544  1048 1051 1061 1087 -hsync +vsync

    # Warning: Aspect Ratio is not CVT standard.
    # 1864x1048 59.90 Hz (CVT) hsync: 65.11 kHz; pclk: 162.00 MHz
    Modeline "1864x1048_60.00"  162.00  1864 1984 2176 2488  1048 1051 1061 1087 -hsync +vsync

    Option "PreferredMode" "1904x1048_60.00"
EndSection
CtrlO, Enter to save, then CtrlX to exit.
This sets up a new 1904x1048 screen resolution as the default, which cuts off 16 pixels left and right (8 on each side), and 32 pixels top and bottom (16 on each side). On my display, more pixels are covered up at the top than at the bottom, so this leaves a slight black border at the bottom of the screen.
The other two resolutions you can try are:
- 1864x1048, which is proportionately the same as 1920x1080, but will leave black bars on the left and right as well as the bottom; and
- 1800x1000, which is way smaller and will have black bars on all sides, but will definitely let you see the entire screen without cutting anything off, and then you can grow it from there.
If you find you have more or fewer pixels covered up and start playing with cvt and xrandr to find a better modeline, remember that while the height can be any value, the width has to be a multiple of 8 pixels, so you can only adjust 4 pixels left or right at a time.
Trackpad
Using the stock firmware, tap-to-click does not appear to be available.
❓I can't tell if it's a USB bus saturation thing (like the Razer Core would experience), or if it's a build quality thing, but using the stock firmware, sometimes the trackpad becomes real slow or even completely unresponsive. Haven't tested the updated firmware enough yet.
A separate mouse plugged into a USB 2.0 port on the RPi4 doesn't experience the same issues, but that doesn't help narrow it down any.
Using the v0.6.1.1+ firmware, tap-to-click appears to be available, and cannot be disabled. The device reports to libinput as a pointer or mouse. Things I tried:
- There's no tapping properties visible with
xinput list-props - It doesn't respond to
Option "MaxTapTime" "0"inxorg.conf.d - Forcing it to be a touchpad with a new udev rule for libinput fails with "failed touchpad sanity checks" and disables the touchpad entirely.
- Disabling the pointer buttons using
xmodmapworks, but there doesn't appear to be a good way to then use the keyboard to click instead, whether withxmodmap,xbindkeys,xdotool, mousekeys mode, or Openbox.
I haven't used it long enough to see if the unresponsiveness returns with the updated firmware.
Charging LEDs, battery
❓Similarly to this Reddit post and top comment, the charging LEDs don't seem to behave as described in the Superbook manual. It never gets to solid green, it's always either flashing or orange/red. The original manual says:
| LED state | Indicates |
|---|---|
| Right light is off | Superbook is off |
| Right light is solid green | Superbook has greater than 75% of its battery remaining |
| Right light is solid yellow | Superbook has between 50-75% of its battery remaining |
| Right light is solid orange | Superbook has between 25-50% of its battery remaining |
| Right light is solid red | Superbook has less than 25% of its remaining battery |
| Right light is flashing green and another color | Superbook is charging. The other color is the remaining battery life |
| Right light is flashing red | Superbook is not charging and has less than 5% of its battery remaining |
With the v0.8.0.1 firmware, my LEDs now flash something similar to "SOS" as described in this unanswered November 2018 Reddit post and this related January 2019 comment.
At some point, the battery completely discharged, and refuses to recharge. The diagnostics flowchart suggests that the SOS message was a known firmware bug. However, the not-charging symptom suggests a "battery connection issue" requiring an RMA, which, uh, there's not really an option for, now. Tried a hard reset and left it charging overnight to no avail. Popped the bottom case open and the battery connector looks like it's just taped down to the mating connector on the motherboard, it peeled right off. I don't have any way to safely test whether the connections are good or if it just needed to be reseated, and it's dangerous to be unsure around lithium cells, so I pulled the battery out entirely. I will have to power it, like the Pi, from an external battery pack.
Firmware update
The Pi Book Pro appears to ship with whatever original factory firmware the Sentio Superbook originally shipped with. It's old enough that the standalone Linux updater doesn't report the device serial number or firmware versions and is unable to update it; presumably the Sentio Desktop Android app would have updated it at least once.
The Sentio Superbook Updater Android app is no longer available from the Google Play Store, but APKs can still be found on mirror sites.
- The original release was in September 2018.
- In October 2018, there was a v0.7.0.3 release.
- In January 2019 there was a v0.7.0.5 release reporting trackpad and stability improvements.
- In April 2019 there was a v0.8.0.1 firmware update with an entire new battery fw management.
- A week later in May 2019 there was a rollback to v0.7.0.3, with no reason specified.
After repeated attempts with an Android 8.x phone with USB-OTG (micro-USB), I was able to update the Pi Book Pro firmware to v0.8.0.1. It was recognized by the standalone Ubuntu updater as well.
Firmware downgrade
Follow the diagnostics flowchart to put the Pi Book Pro in DFU mode:
- With the Pi Book Pro on and powered, and no devices connected to it, hold down D, F, and U keys.
- Using a pin, press the reset button on the underside for five seconds while continuing to hold down the keys.
- Wait twenty (20) seconds before releasing the keys.
- Wait three (3) more minutes before plugging anything in.
This appears to reset the Pi Book Pro to an older firmware. I'm not 100% sure it's stock; the Android updater reports it as 0.6.1.1, and tap-to-click is available on the touch pad. But, it's old enough that the USB-A port reliably powers a Pi 4, and that's probably what matters.
I do not recommend upgrading firmware beyond stock.
Raspberry Pi 4 USB 3 v. USB 2 performance
Benchmarking Linux display driver performance was in rough shape in 2009 and doesn't appear to have gotten much better in the intervening decade. To try and determine the performance of the DisplayLink 3.0 display, I ran:
first on the HDMI output, then on the Pi Book Pro output using the USB 3.0 port, and finally again on a USB 2.0 port.
| Test | HDMI | Pi Book Pro |
|---|---|---|
vblank_mode=0 glxgears |
1154 FPS | 224 FPS |
| GtkPerf (1000 runs) | 116.11s | 86.97s |
| GeeXLab | ~220 FPS | ~50 FPS |
09-noise-animation-electric.xml |
~100 FPS | ~16 FPS |
43-smiley-tutorial.xml |
~60 FPS | ~14 FPS |
21-radial_blur.xml |
~14 FPS | ~4 FPS |
The USB 3.0 and USB 2.0 runs are not broken out separately because they performed identically! The USB bus does not appear to be the limiting factor for the DisplayLink performance. This potentially means if a Pi 4B with the USB-C power fix allows for the Pi Book Pro to boot the Pi with a single cable, performance shouldn't be impacted.
(A previously open question about the differences between Full KMS and Fake KMS has been struck, as Full KMS is not available on the Raspberry Pi 4 as of this writing.)
Here are the full runs:
HDMI
pi@rpi4superbook:~ $ vblank_mode=0 glxgears
ATTENTION: default value of option vblank_mode overridden by environment.
5631 frames in 5.0 seconds = 1126.061 FPS
5776 frames in 5.0 seconds = 1155.067 FPS
5763 frames in 5.0 seconds = 1152.431 FPS
5775 frames in 5.0 seconds = 1154.885 FPS
5760 frames in 5.0 seconds = 1151.942 FPS
5778 frames in 5.0 seconds = 1155.562 FPS

pi@rpi4superbook:~ $ gtkperf

(gtkperf:937): Gtk-WARNING **: 00:34:00.150: GtkSpinButton: setting an adjustment with non-zero page size is deprecated

(gtkperf:937): Gtk-WARNING **: 00:34:00.187: GtkSpinButton: setting an adjustment with non-zero page size is deprecated
GtkPerf 0.40 - Starting testing: Sat Jul  4 00:34:08 2020

GtkEntry - time:  0.70
GtkComboBox - time:  7.17
GtkComboBoxEntry - time:  5.69
GtkSpinButton - time:  1.78
GtkProgressBar - time:  1.46
GtkToggleButton - time:  1.51
GtkCheckButton - time:  1.10
GtkRadioButton - time:  1.99
GtkTextView - Add text - time: 35.40
GtkTextView - Scroll - time:  4.46
GtkDrawingArea - Lines - time: 19.23
GtkDrawingArea - Circles - time: 26.06
GtkDrawingArea - Text - time:  7.26
GtkDrawingArea - Pixbufs - time:  2.28
 ---
Total time: 116.11
USB
pi@rpi4superbook:~ $ vblank_mode=0 glxgears
ATTENTION: default value of option vblank_mode overridden by environment.
947 frames in 5.0 seconds = 189.269 FPS
1131 frames in 5.0 seconds = 225.955 FPS
1127 frames in 5.0 seconds = 225.065 FPS
1139 frames in 5.0 seconds = 227.528 FPS
1105 frames in 5.0 seconds = 220.751 FPS
1113 frames in 5.0 seconds = 222.581 FPS

pi@rpi4superbook:~/Downloads/GeeXLab_FREE_rpi_gl21 $ gtkperf

(gtkperf:1233): Gtk-WARNING **: 00:09:29.307: GtkSpinButton: setting an adjustment with non-zero page size is deprecated

(gtkperf:1233): Gtk-WARNING **: 00:09:29.338: GtkSpinButton: setting an adjustment with non-zero page size is deprecated
GtkPerf 0.40 - Starting testing: Sat Jul  4 00:09:37 2020

GtkEntry - time:  0.73
GtkComboBox - time:  9.61
GtkComboBoxEntry - time:  6.64
GtkSpinButton - time:  1.16
GtkProgressBar - time:  0.83
GtkToggleButton - time:  1.40
GtkCheckButton - time:  1.05
GtkRadioButton - time:  1.45
GtkTextView - Add text - time: 36.17
GtkTextView - Scroll - time:  5.45
GtkDrawingArea - Lines - time:  5.51
GtkDrawingArea - Circles - time: 11.72
GtkDrawingArea - Text - time:  4.40
GtkDrawingArea - Pixbufs - time:  0.83
 ---
Total time: 86.97
Switching to HDMI, multiple displays
The Pi Book Pro doesn't really make sense as a bench display, where you might switch it between multiple Raspberry Pis, or use it with Pis that also have to run on HDMI. It's best used with a Raspberry Pi dedicated to it, e.g. as a laptop replacement.
According to the DisplayLink documentation, as of this writing (July 2020), there are significant limitations:
- You can't use the Pi Book Pro as a second display alongside an HDMI display, it's one or the other
- You can't display a virtual console on the Pi Book Pro
If you switch to a new virtual console with CtrlAltF2, it will freeze the DisplayLink screen, and show the virtual console on HDMI 0 (aka HDMI-A-1). Drawing to /dev/fb0 will work now, showing on the HDMI display. To return to X11 on the DisplayLink screen, CtrlF1 for X11's virtual console, then sudo service lightdm restart.
Because virtual consoles aren't displayed on the DisplayLink screen, I suspect it's not possible to boot the Raspberry Pi into a virtual console only, without X11.
Raspberry Pi Zero
I couldn't get the display to start on a Raspberry Pi Zero. xrandr reports the display is disconnected when plugged into the Zero's sole USB port with an OTG adapter.
Other open questions
❓How can I switch the function keys from being media keys by default (press Fn to get the function) to being function keys by default (and pressing Fn to get the media key)? I now suspect this will require remapping each key manually.
Installing on Pi 3B/4, Raspberry Pi OS August 2020, DisplayLink 5.3.1
Deprecated, see below.
Raspberry Pi OS updates after December 14, 2020
Deprecated, see below.
Installing on Pi 2B/3B/4, Raspberry Pi OS March 4 2021, DisplayLink 5.4
There have been a few Raspberry Pi OS updates, and some issues with the DisplayLink software, since I originally wrote these instructions. Unfortunately, the current version of Raspberry Pi OS and the previous and current DisplayLink driver appear to be incompatible out of the box. You'll need to do a little extra work to keep your Pi Book Pro running until everything matches back up again.
Here are what I believe to be accurate instructions for installing everything you need to run the Pi Book Pro on a Raspberry Pi 2B, 3B or 4, using the latest Raspberry Pi OS dated March 4 2021, and the legacy DisplayLink 5.3.1 drivers for Ubuntu.
Plug an external HDMI display, USB keyboard, and USB mouse into your Raspberry Pi. You cannot use the Pi Book Pro to set up the Raspberry Pi for the first time.
Format a Micro SD card with "Raspberry Pi OS (Legacy)". Using the official Raspberry Pi Imager is recommended (it's under "Raspberry Pi OS (other)"). Follow the official instructions to set up your Raspberry Pi, including making sure your networking is working (wifi or ethernet). Restart when prompted. You'll have a desktop on your HDMI display that looks like this:

Next, we need to enable an option called "kernel mode-setting." Click on the Terminal icon ( ) to open a console window, and type
 sudo raspi-config. This opens the text-based raspi-config utility. Navigate the menus from Advanced Options to GL Driver and enable Fake KMS. See the official raspi-config documentation for more detailed instructions if you need help. If it asks you to reboot, say Yes.
Then, we need to roll back the Raspberry Pi OS kernel version to a compatible version. Raspberry Pi OS now ships with 5.10.x, and we need 5.4.x.
Click on the Terminal icon again, and enter the following commands to install a previous kernel, install supporting software, install the source code for that kernel, and configure the source code for that kernel. I've included the full output of the commands for you to compare to, as this is an atypical process:
$ sudo rpi-update 43022f5adbbf5d6e05ea0e022a3090c2c9feff7c
 *** Raspberry Pi firmware updater by Hexxeh, enhanced by AndrewS and Dom
 *** Performing self-update
 *** Relaunching after update
 *** Raspberry Pi firmware updater by Hexxeh, enhanced by AndrewS and Dom
 *** We're running for the first time
 *** Backing up files (this will take a few minutes)
 *** Backing up firmware
 *** Backing up modules 5.10.17-v7l+
.#############################################################
WARNING: This update bumps to rpi-5.4.y linux tree
See: https://www.raspberrypi.org/forums/viewtopic.php?f=29&t=269769

'rpi-update' should only be used if there is a specific
reason to do so - for example, a request by a Raspberry Pi
engineer or if you want to help the testing effort
and are comfortable with restoring if there are regressions.

DO NOT use 'rpi-update' as part of a regular update process.

.##############################################################
Would you like to proceed? (y/N)
 *** Downloading specific firmware revision (this will take a few minutes)
. % Total    % Received % Xferd  Average Speed   Time    Time     Time  Current
                                 Dload  Upload   Total   Spent    Left  Speed
100   168  100   168    0     0   1105      0 --:--:-- --:--:-- --:--:--  1112
100  117M    0  117M    0     0  6254k      0 --:--:--  0:00:19 --:--:-- 5135k
 *** Updating firmware
 *** Updating kernel modules
 *** depmod 5.4.83+
 *** depmod 5.4.83-v8+
 *** depmod 5.4.83-v7+
 *** depmod 5.4.83-v7l+
 *** Updating VideoCore libraries
 *** Using HardFP libraries
 *** Updating SDK
 *** Running ldconfig
 *** Storing current firmware revision
 *** Deleting downloaded files
 *** Syncing changes to disk
 *** If no errors appeared, your firmware was successfully updated to 43022f5adbbf5d6e05ea0e022a3090c2c9feff7c
 *** A reboot is needed to activate the new firmware
Then, type sudo reboot to reboot into the new (old) kernel. Next, five more commands (apt, wget, chmod, and rpi-source twice):
$ sudo apt install git bc bison flex libssl-dev
Reading package lists... Done
Building dependency tree
Reading state information... Done
bc is already the newest version (1.07.1-2).
bc set to manually installed.
git is already the newest version (1:2.20.1-2+deb10u3).
The following additional packages will be installed:
  libbison-dev libfl-dev libsigsegv2 m4
Suggested packages:
  bison-doc flex-doc libssl-doc m4-doc
The following NEW packages will be installed:
  bison flex libbison-dev libfl-dev libsigsegv2 libssl-dev m4
0 upgraded, 7 newly installed, 0 to remove and 0 not upgraded.
Need to get 3,662 kB of archives.
After this operation, 10.3 MB of additional disk space will be used.
Do you want to continue? [Y/n]
Get:1 http://archive.raspberrypi.org/debian buster/main armhf libssl-dev armhf 1.1.1d-0+deb10u6+rpt1 [1,584 kB]
Get:2 http://raspbian.mirrors.lucidnetworks.net/raspbian buster/main armhf libsigsegv2 armhf 2.12-2 [32.3 kB]
Get:3 http://raspbian.mirrors.lucidnetworks.net/raspbian buster/main armhf m4 armhf 1.4.18-2 [185 kB]
Get:4 http://raspbian.mirrors.lucidnetworks.net/raspbian buster/main armhf flex armhf 2.6.4-6.2 [427 kB]
Get:5 http://raspbian.mirrors.lucidnetworks.net/raspbian buster/main armhf libbison-dev armhf 2:3.3.2.dfsg-1 [500 kB]
Get:6 http://raspbian.mirrors.lucidnetworks.net/raspbian buster/main armhf bison armhf 2:3.3.2.dfsg-1 [829 kB]
Get:7 http://raspbian.mirrors.lucidnetworks.net/raspbian buster/main armhf libfl-dev armhf 2.6.4-6.2 [104 kB]
Fetched 3,662 kB in 4s (1,015 kB/s)
Selecting previously unselected package libsigsegv2:armhf.
(Reading database ... 98611 files and directories currently installed.)
Preparing to unpack .../0-libsigsegv2_2.12-2_armhf.deb ...
Unpacking libsigsegv2:armhf (2.12-2) ...
Selecting previously unselected package m4.
Preparing to unpack .../1-m4_1.4.18-2_armhf.deb ...
Unpacking m4 (1.4.18-2) ...
Selecting previously unselected package flex.
Preparing to unpack .../2-flex_2.6.4-6.2_armhf.deb ...
Unpacking flex (2.6.4-6.2) ...
Selecting previously unselected package libbison-dev:armhf.
Preparing to unpack .../3-libbison-dev_2%3a3.3.2.dfsg-1_armhf.deb ...
Unpacking libbison-dev:armhf (2:3.3.2.dfsg-1) ...
Selecting previously unselected package bison.
Preparing to unpack .../4-bison_2%3a3.3.2.dfsg-1_armhf.deb ...
Unpacking bison (2:3.3.2.dfsg-1) ...
Selecting previously unselected package libfl-dev:armhf.
Preparing to unpack .../5-libfl-dev_2.6.4-6.2_armhf.deb ...
Unpacking libfl-dev:armhf (2.6.4-6.2) ...
Selecting previously unselected package libssl-dev:armhf.
Preparing to unpack .../6-libssl-dev_1.1.1d-0+deb10u6+rpt1_armhf.deb ...
Unpacking libssl-dev:armhf (1.1.1d-0+deb10u6+rpt1) ...
Setting up libbison-dev:armhf (2:3.3.2.dfsg-1) ...
Setting up libsigsegv2:armhf (2.12-2) ...
Setting up libssl-dev:armhf (1.1.1d-0+deb10u6+rpt1) ...
Setting up m4 (1.4.18-2) ...
Setting up bison (2:3.3.2.dfsg-1) ...
update-alternatives: using /usr/bin/bison.yacc to provide /usr/bin/yacc (yacc) in auto mode
Setting up flex (2.6.4-6.2) ...
Setting up libfl-dev:armhf (2.6.4-6.2) ...
Processing triggers for libc-bin (2.28-10+rpi1) ...
Processing triggers for man-db (2.8.5-2) ...
Processing triggers for install-info (6.5.0.dfsg.1-4+b1) ...
$ sudo wget https://raw.githubusercontent.com/RPi-Distro/rpi-source/master/rpi-source -O /usr/local/bin/rpi-source
--2021-04-14 21:35:25--  https://raw.githubusercontent.com/RPi-Distro/rpi-source/master/rpi-source
Resolving raw.githubusercontent.com (raw.githubusercontent.com)... 185.199.108.133, 185.199.111.133, 185.199.110.133, ...
Connecting to raw.githubusercontent.com (raw.githubusercontent.com)|185.199.108.133|:443... connected.
HTTP request sent, awaiting response... 200 OK
Length: 14222 (14K) [text/plain]
Saving to: ‘/usr/local/bin/rpi-source’

/usr/local/bin/rpi- 100%[===================>]  13.89K  --.-KB/s    in 0.001s

2021-04-14 21:35:25 (9.44 MB/s) - ‘/usr/local/bin/rpi-source’ saved [14222/14222]

$ sudo chmod +x /usr/local/bin/rpi-source
$ /usr/local/bin/rpi-source -q --tag-update
$ rpi-source

 *** SoC: BCM2711

 *** rpi-update: https://github.com/Hexxeh/rpi-firmware

 *** Firmware revision: 43022f5adbbf5d6e05ea0e022a3090c2c9feff7c

 *** Linux source commit: 76c49e60e742d0bebd798be972d67dd3fd007691

 *** Download kernel source
--2021-04-14 21:35:47--  https://github.com/raspberrypi/linux/archive/76c49e60e742d0bebd798be972d67dd3fd007691.tar.gz
Resolving github.com (github.com)... 140.82.113.4
Connecting to github.com (github.com)|140.82.113.4|:443... connected.
HTTP request sent, awaiting response... 302 Found
Location: https://codeload.github.com/raspberrypi/linux/tar.gz/76c49e60e742d0bebd798be972d67dd3fd007691 [following]
--2021-04-14 21:35:48--  https://codeload.github.com/raspberrypi/linux/tar.gz/76c49e60e742d0bebd798be972d67dd3fd007691
Resolving codeload.github.com (codeload.github.com)... 140.82.114.9
Connecting to codeload.github.com (codeload.github.com)|140.82.114.9|:443... connected.
HTTP request sent, awaiting response... 200 OK
Length: unspecified [application/x-gzip]
Saving to: ‘/home/pi/linux-76c49e60e742d0bebd798be972d67dd3fd007691.tar.gz’

/home/pi/linux-76c4     [<=>                 ] 167.12M  6.15MB/s    in 27s

2021-04-14 21:36:16 (6.09 MB/s) - ‘/home/pi/linux-76c49e60e742d0bebd798be972d67dd3fd007691.tar.gz’ saved [175242951]


 *** Unpack kernel source
...............................................................................................................................................................................................................................................................................................................................................................................................................................................................................................................................................................................................................................................................................................................................................................................................................................................................................................................................................................
 *** Add '+' to kernel release string

 *** Create symlink: /home/pi/linux

 *** Create /lib/modules/<ver>/{build,source} symlinks

 *** .config

 *** Module.symvers

 *** make modules_prepare
  HOSTCC  scripts/basic/fixdep
  HOSTCC  scripts/kconfig/conf.o
  HOSTCC  scripts/kconfig/confdata.o
  HOSTCC  scripts/kconfig/expr.o
  LEX     scripts/kconfig/lexer.lex.c
  YACC    scripts/kconfig/parser.tab.[ch]
  HOSTCC  scripts/kconfig/lexer.lex.o
  HOSTCC  scripts/kconfig/parser.tab.o
  HOSTCC  scripts/kconfig/preprocess.o
  HOSTCC  scripts/kconfig/symbol.o
  HOSTLD  scripts/kconfig/conf
scripts/kconfig/conf  --syncconfig Kconfig
  SYSHDR  arch/arm/include/generated/uapi/asm/unistd-common.h
  SYSHDR  arch/arm/include/generated/uapi/asm/unistd-oabi.h
  SYSHDR  arch/arm/include/generated/uapi/asm/unistd-eabi.h
  HOSTCC  scripts/dtc/dtc.o
  HOSTCC  scripts/dtc/flattree.o
  HOSTCC  scripts/dtc/fstree.o
  HOSTCC  scripts/dtc/data.o
  HOSTCC  scripts/dtc/livetree.o
  HOSTCC  scripts/dtc/treesource.o
  HOSTCC  scripts/dtc/srcpos.o
  HOSTCC  scripts/dtc/checks.o
  HOSTCC  scripts/dtc/util.o
  LEX     scripts/dtc/dtc-lexer.lex.c
  YACC    scripts/dtc/dtc-parser.tab.[ch]
  HOSTCC  scripts/dtc/dtc-lexer.lex.o
  HOSTCC  scripts/dtc/dtc-parser.tab.o
  HOSTLD  scripts/dtc/dtc
  HOSTCC  scripts/genksyms/genksyms.o
  YACC    scripts/genksyms/parse.tab.[ch]
  HOSTCC  scripts/genksyms/parse.tab.o
  LEX     scripts/genksyms/lex.lex.c
  HOSTCC  scripts/genksyms/lex.lex.o
  HOSTLD  scripts/genksyms/genksyms
  HOSTCC  scripts/kallsyms
  HOSTCC  scripts/pnmtologo
  HOSTCC  scripts/conmakehash
  HOSTCC  scripts/recordmcount
  HOSTCC  scripts/sortextable
  HOSTCC  scripts/asn1_compiler
  HOSTCC  scripts/extract-cert
  WRAP    arch/arm/include/generated/uapi/asm/kvm_para.h
  WRAP    arch/arm/include/generated/uapi/asm/bitsperlong.h
  WRAP    arch/arm/include/generated/uapi/asm/bpf_perf_event.h
  WRAP    arch/arm/include/generated/uapi/asm/errno.h
  WRAP    arch/arm/include/generated/uapi/asm/ioctl.h
  WRAP    arch/arm/include/generated/uapi/asm/ipcbuf.h
  WRAP    arch/arm/include/generated/uapi/asm/msgbuf.h
  WRAP    arch/arm/include/generated/uapi/asm/param.h
  WRAP    arch/arm/include/generated/uapi/asm/poll.h
  WRAP    arch/arm/include/generated/uapi/asm/resource.h
  WRAP    arch/arm/include/generated/uapi/asm/sembuf.h
  WRAP    arch/arm/include/generated/uapi/asm/shmbuf.h
  WRAP    arch/arm/include/generated/uapi/asm/siginfo.h
  WRAP    arch/arm/include/generated/uapi/asm/socket.h
  WRAP    arch/arm/include/generated/uapi/asm/sockios.h
  WRAP    arch/arm/include/generated/uapi/asm/termbits.h
  WRAP    arch/arm/include/generated/uapi/asm/termios.h
  WRAP    arch/arm/include/generated/asm/compat.h
  WRAP    arch/arm/include/generated/asm/current.h
  WRAP    arch/arm/include/generated/asm/early_ioremap.h
  WRAP    arch/arm/include/generated/asm/emergency-restart.h
  WRAP    arch/arm/include/generated/asm/exec.h
  WRAP    arch/arm/include/generated/asm/extable.h
  WRAP    arch/arm/include/generated/asm/flat.h
  WRAP    arch/arm/include/generated/asm/irq_regs.h
  WRAP    arch/arm/include/generated/asm/kdebug.h
  WRAP    arch/arm/include/generated/asm/local.h
  WRAP    arch/arm/include/generated/asm/local64.h
  WRAP    arch/arm/include/generated/asm/mm-arch-hooks.h
  WRAP    arch/arm/include/generated/asm/mmiowb.h
  WRAP    arch/arm/include/generated/asm/msi.h
  WRAP    arch/arm/include/generated/asm/parport.h
  WRAP    arch/arm/include/generated/asm/preempt.h
  WRAP    arch/arm/include/generated/asm/seccomp.h
  WRAP    arch/arm/include/generated/asm/serial.h
  WRAP    arch/arm/include/generated/asm/trace_clock.h
  WRAP    arch/arm/include/generated/asm/simd.h
  UPD     include/config/kernel.release
  UPD     include/generated/uapi/linux/version.h
  UPD     include/generated/utsrelease.h
  SYSNR   arch/arm/include/generated/asm/unistd-nr.h
  GEN     arch/arm/include/generated/asm/mach-types.h
  SYSTBL  arch/arm/include/generated/calls-oabi.S
  SYSTBL  arch/arm/include/generated/calls-eabi.S
  CC      scripts/mod/empty.o
  HOSTCC  scripts/mod/mk_elfconfig
  MKELF   scripts/mod/elfconfig.h
  HOSTCC  scripts/mod/modpost.o
  CC      scripts/mod/devicetable-offsets.s
  UPD     scripts/mod/devicetable-offsets.h
  HOSTCC  scripts/mod/file2alias.o
  HOSTCC  scripts/mod/sumversion.o
  HOSTLD  scripts/mod/modpost
  CC      kernel/bounds.s
  UPD     include/generated/bounds.h
  UPD     include/generated/timeconst.h
  CC      arch/arm/kernel/asm-offsets.s
  UPD     include/generated/asm-offsets.h
  CALL    scripts/checksyscalls.sh
  CALL    scripts/atomic/check-atomics.sh

 *** ncurses-devel is NOT installed. Needed by 'make menuconfig'. On Raspberry Pi OS,
run 'sudo apt install libncurses5-dev' to install it.

 *** Help: https://github.com/RPi-Distro/rpi-source/blob/master/README.md
Then, we'll download the legacy DisplayLink drivers suitable for the Pi Book Pro screen. Click on the Web Browser icon ( ) and visit the URL
 https://www.synaptics.com/products/displaylink-graphics/downloads/ubuntu. Click the + alongside "Legacy Drivers", then Download alongside the "Release 5.3.1" drivers, then Accept to start the download onto your Raspberry Pi.
Once the download completes, we'll need to uncompress and install it. Click on the Terminal icon again and type in cd Downloads to change to the Downloads directory. Then, unzip DisplayLink\ USB\ Graphics\ Software\ for\ Ubuntu5.3.1-EXE.zip to uncompress it (you may be able to autocomplete the file name by typing just unzip Display and then pressing Tab). Run the installer by typing sudo bash ./displaylink-driver-5.3.1.34.run (again, you may be able to autocomplete the file name by typing just sudo bash ./displaylink and pressing Tab).
The DisplayLink driver will automatically download all the dependencies it needs. Hit Enter at the download prompt to confirm.
When the installer completes successfully, it will prompt you to reboot. We've a couple changes to make still, so press N and Enter to decline.
On the Pi 3B, the DisplayLink driver seems to occasionally load too slowly, and isn't ready by the time the Pi wants to display the desktop, so we need to force it to restart the desktop display manager in those cases. This is less of an issue on the faster Pi 4, but these changes are still safe to make. In the Terminal window, type sudo nano /lib/systemd/system/displaylink-driver.service. This will start a text editor. Use the arrow keys to move down to the [Service] section, and add a new line after the ExecStart line that reads ExecStartPost=/bin/systemctl try-restart display-manager. (If you're copy-and-pasting from the web browser, you can paste using CtrlShiftV.) That whole section should look like this:
[Service]
ExecStartPre=/bin/sh -c 'modprobe evdi || (dkms install $(ls -t /usr/src | grep evdi | head -n1  | sed -e "s:-:/:") && modprobe evdi)'
ExecStart=/opt/displaylink/DisplayLinkManager
ExecStartPost=/bin/systemctl try-restart display-manager
Restart=always
WorkingDirectory=/opt/displaylink
RestartSec=5
Press CtrlO, Enter to save, then CtrlX to exit. Enable the changes by typing sudo systemctl daemon-reload in the Terminal window. (If you don't make these changes, and your Pi ever boots up but nothing shows on the screen, you can blindly reboot it by pressing CtrlAltDel to bring up the shutdown menu, then Down arrow to select Reboot, then Spacebar to press it.)
We also need to accommodate the fact that the bezel covers up some of the pixels of the display. In the Terminal window, type sudo nano /usr/share/X11/xorg.conf.d/10-monitor.conf to create a new monitor configuration file. In it, type or paste (CtrlShiftV) the following:
Section "Monitor"
    Identifier "DVI-I-1"
    # Warning: Aspect Ratio is not CVT standard.
    # 1800x1000 59.91 Hz (CVT) hsync: 62.19 kHz; pclk: 148.75 MHz
    Modeline "1800x1000_60.00"  148.75  1800 1912 2096 2392  1000 1003 1013 1038 -hsync +vsync

    # Warning: Aspect Ratio is not CVT standard.
    # 1904x1048 59.94 Hz (CVT) hsync: 65.15 kHz; pclk: 165.75 MHz
    Modeline "1904x1048_60.00"  165.75  1904 2024 2224 2544  1048 1051 1061 1087 -hsync +vsync

    # Warning: Aspect Ratio is not CVT standard.
    # 1864x1048 59.90 Hz (CVT) hsync: 65.11 kHz; pclk: 162.00 MHz
    Modeline "1864x1048_60.00"  162.00  1864 1984 2176 2488  1048 1051 1061 1087 -hsync +vsync

    Option "PreferredMode" "1904x1048_60.00"
EndSection
Again, CtrlO, Enter to save, then CtrlX to exit. See the Display, overscan, bezel section above for details and additional configuration options.
Now we can reboot, and the Pi Book Pro should be the primary display for the Raspberry Pi desktop. In the Terminal window, type sudo reboot. You can unplug your HDMI display, your USB keyboard and USB mouse.
I'm Vitorio, it's June 26, 2020, thanks for your time. Updated July 3, 2020 with firmware notes. Updated July 4, 2020 with display benchmarks. Updated July 7, 2020 with X11, HDMI, and trackpad notes. Updated July 9, 2020 with battery notes. Updated July 11, 2020 with Raspberry Pi Zero notes. Updated July 13, 2020 with 8GB Pi4 notes. Updated October 3, 2020 with installation instructions. Updated October 24, 2020 after testing an SSD installation. Updated November 14, 2020 with firmware downgrade information. Updated March 15, 2021 with 5.10.x kernel information, thanks to Levi Buck. Updated April 6, 2021 after testing the new DisplayLink driver release and finding it still doesn't work. Updated April 14, 2021 with some kernel installation tweaks and confirmation that the 2B works, thanks to Christopher Nuzum. Updated December 20, 2021, with the note that the "legacy" OS needs to be chosen for new installs, thanks to Anthony Saxton.